How to Replace reCAPTCHA with Cloudflare Turnstile in WordPress
Step 1: Get Your Cloudflare Turnstile Keys
First, you need to generate a Site Key and a Secret Key from your Cloudflare account.
- Log in to your Cloudflare dashboard.
- From the left-hand menu, navigate to Turnstile.
- Click the Add Site button.
- Give your widget a name (e.g., “WordPress Login”), enter your website’s domain, and select the widget type (e.g., “Managed”).
- Click Create.
- On the next page, you will see your Site Key and Secret Key. Keep this tab open, as you will need these keys in the next step.
Step 2: Install a Turnstile Plugin on WordPress
To integrate Turnstile with WordPress, the easiest method is to use a plugin.
- Go to your WordPress Dashboard and navigate to Plugins > Add New.
- In the search bar, type “Simple Cloudflare Turnstile”.
- Install and activate the plugin by “Simple Cloudflare Turnstile”.
Step 3: Configure the Plugin
Now you need to connect the plugin to your Cloudflare account using the keys you generated.
- In your WordPress Dashboard, go to Settings > Cloudflare Turnstile.
- Paste the Site Key and Secret Key you obtained in Step 1 into the corresponding fields.
- Scroll down to the “Enable Turnstile on forms” section and check the boxes for the forms you want to protect (e.g., Login Form, Registration Form, Comment Form).
- Click the Save Changes button.
Step 4: Test Your New Turnstile Widget
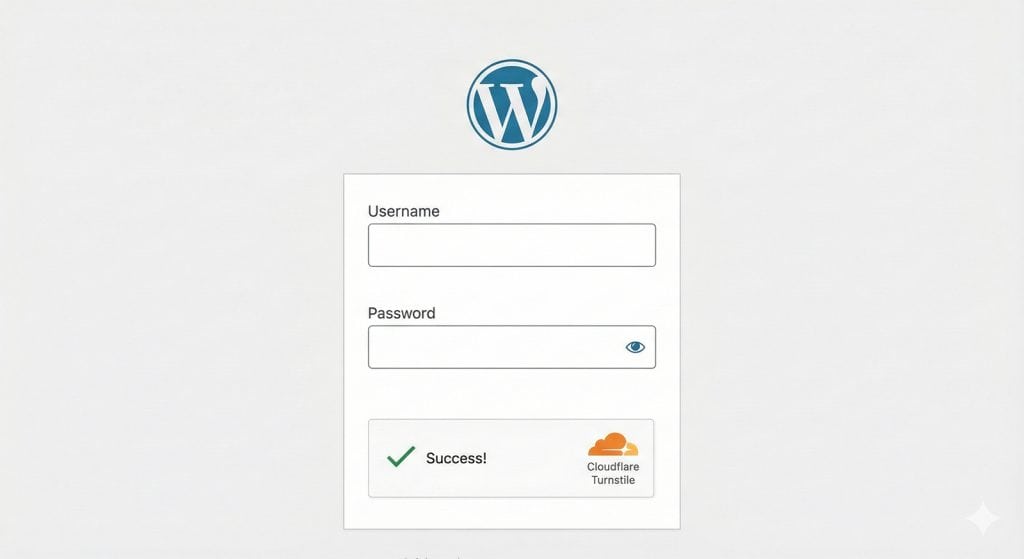
Your forms should now be protected by Cloudflare Turnstile. To test it, log out of your WordPress site and go to your login page. You should see the new Turnstile widget instead of reCAPTCHA.
The image below shows what a WordPress login form looks like with a successfully implemented Cloudflare Turnstile widget.
You have now successfully replaced reCAPTCHA with Cloudflare Turnstile, providing a better user experience for your visitors while keeping your site secure.